- Install your preferred MP4 Recorder.
- Prepare your screen to record.
- Edit and enhance the video
MP4 file is a digital container that allows users to store audio and video sources in small and compressed file sizes. It is also a popular file format for streaming services to use and publish video files. Therefore, it raises its popularity due to these streaming services. In addition, many screen recorders used this file container as their default video format when capturing a computer screen. This container provides a lesser file size while retaining the excellent quality of the recorded screen. MP4 Recorders have become a household name for users who need to capture videos, screen activity, and different files that cannot convert to MP4. With these recorders, you can efficiently perform that in the comfort of your home. Another benefit of screen recorders that use MP4 is that it allows users to change the file's metadata, and they can be used on different media players or platforms. If you are looking for an MP4 recorder and still need to decide what to use, check the review below.
Review of 7 MP4 Screen Recorder
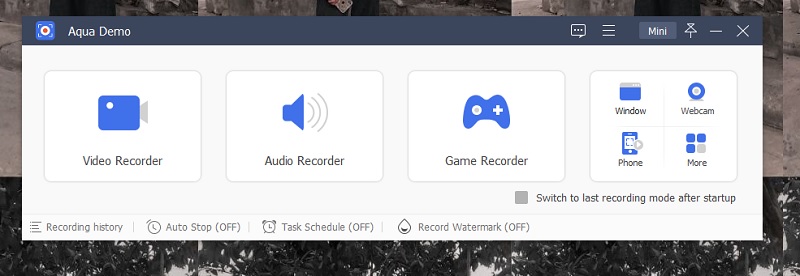
1. AceThinker Aqua Demo
Distinctive Feature: This tool is equipped with a task scheduler that can record computer screens even without manually tapping the recorder button.
What is it best for?: It is suitable for capturing films, TV series, gameplays, demos and tutorials, and screen activity.
Pricing plans: It is a freemium service where you can capture screen activity with limited features. However, you can avail of its premium plans and advanced features by availing of its lifetime subscriptions for $42.95 for one computer.
AceThinker Aqua Demo is a prevalent and most recognizable MP4 recorder on the internet. This application can capture and export anything on your screen to an MP4 file. This tool can capture business demos, gameplay videos, video chats, podcasts, streaming videos, webinars, and more. You can record your webcam with this tool and even annotate the screen while capturing your activity. You should also check its settings and recording parameters. You can check if the output format of the screen recorder is set in MP4 format. This screen recorder with highlighter tool is unique because it can capture screen activity on your mobile devices and save it in MP4 on your computer. You need to screencast your device with the tool, and it can charge your mobile phone screen activity. This is perfect when creating tutorials and demos using your phone while using your computer screen.
Try it for Free
Free Download
Windows 8/10/11
Secure Download
Free Download
Mac OS X 10.15 and above
Secure Download

2. Movavi Screen Recorder
Distinctive Feature: When recording with this tool, you can quickly post or publish it on your social media accounts like YouTube.
What is it best for?: It is suitable for capturing high-graphic videos like games and films.
Pricing plans: This tool is a freemium service where you can record the screen and export it in an MP4 file for free. Yet, you can avail of its lifetime plans for 1 PC for only $26.95.
Are you examining the best screen recorder for films and webinars? Movavi Screen Recorder is a tool that you should try. This tool is well-known for users who record webinars and online meetings, as it can associate the webcam input with the recorded file. You can also use external audio sources like a microphone to add audio information to the recording session. It comes with intuitive and lightweight recording parameters. You can select the recording area according to your preferred size or resolution. Its recording panel has different options, like adding the camera and microphone sources, lowering the volume, stopping, pausing, and even annotating. It also has an editing tool to tweak some changes to the MP4 file.
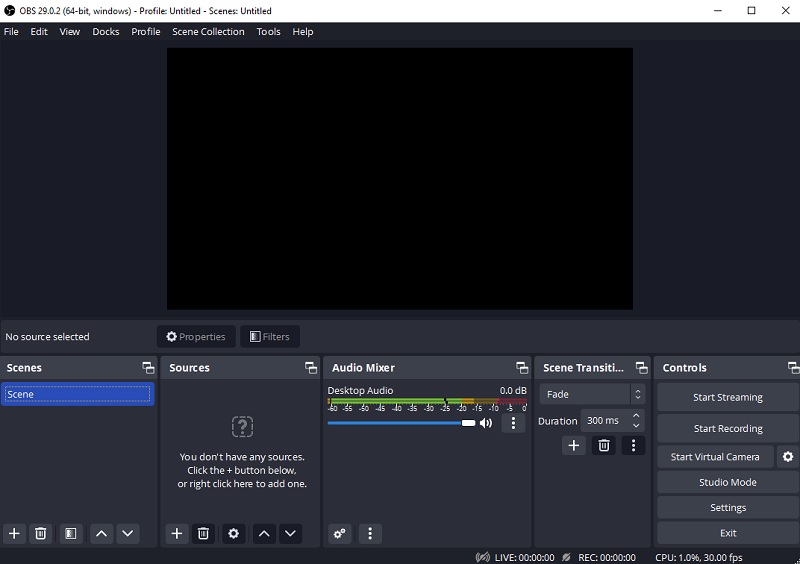
3. OBS Studio
Distinctive Feature: It allows users to stream or simulcast the screen activity on different streaming services while recording your screen.
What is it best for?: This tool is favorable for streamers or content creators who make gameplay videos due to its capability to capture high-graphic videos.
Pricing plans: It is a free service since it is an open-source screen recording tool.
This tool is suggested if you want to have MP4 screen recording software for your gameplay videos. OBS Studio is an open-source screen recording tool that is suitable for professionals. Since it is open-source, its UI and configurations are made for users who have advanced knowledge of streaming and screen recording processes. You can capture different scenes and windows on your computer screen. It does not have any annotation function, but you can tweak its settings to modify the output appearance of your MP4 file. In addition, you can add your webcam or microphone inputs as additional sources to complete your recorded file. It is perfect for hour-duration screen recording sessions for gamers and content creators. This open-source platform or screen recorder is popular with different professionals. If you want to comprehend more about this type of tool, extend your readings by tapping on this link.
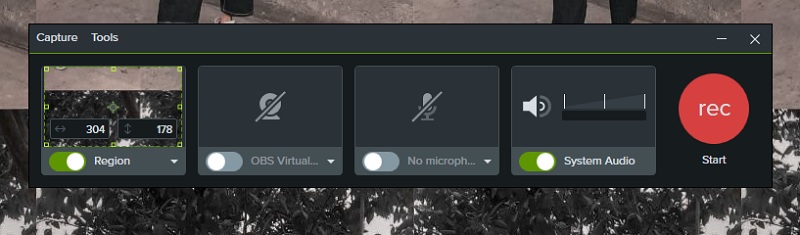
4. Camtasia
Distinctive Feature: It is a two-in-one application as this tool provides a screen recording feature and edits the MP4 file to create better output.
What is it best for?: It is perfect for users who want to create video demos and tutorials due to its screen recording and editing functions.
Pricing plans: Due to its function of having two tools in one software, its pricing plans cost US$199.99 for lifetime support and upgrade.
When you are creating How-to videos or demos for your computer, a screen recorder is what you need. Yet, the output file will not be better if you post the raw file you have recorded on your device. Therefore, having a video editing function on a screen recording tool is better to know for. Camtasia specialized in those requirements to achieve a better MP4 output file. This tool comes with different modes of recording. It can capture an entire screen or a certain region. Also, it can capture webcam input to add it to your recorded file. It has basic recording tools on its recording panel, including pause, stops, restarts, and resume. When you have terminated the process, the tool will directly import the recorded MP4 file to its video editing functions, where users can beautify the output MP4 file.
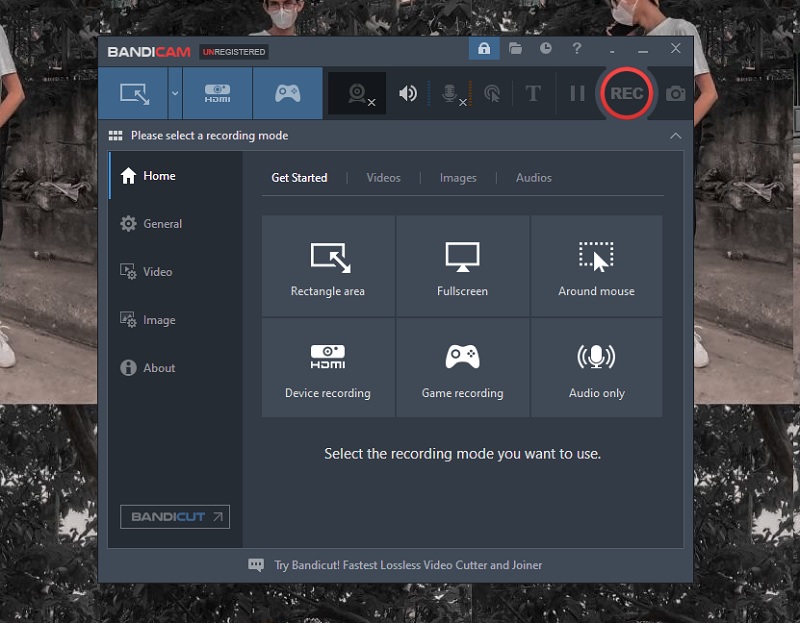
5. Bandicam
Distinctive Feature: A lightweight screen recorder can capture PC games with DirectX/OpenGL/Vulkan graphics technologies.
What is it best for?: It is perfect for users who want to create video demos and tutorials due to its screen recording and editing functions.
Pricing plans: It is a freemium service that can record your screen for free with limited features. However, you must buy its $ 44.96-lifetime subscription to enjoy its advanced features.
When you need to record yourself on Mac - which most of us do- you must set up a better screen recorder for gameplay videos. Bandicam is not just your typical screen recorder; it focuses on recording gameplay videos and related activities. It can record high-quality games and save them in MP4 file format without compromising quality. Furthermore, it saves recorded files in MP4 format with a high compression ratio while preserving the quality of the recorded file. With its game recorder mode, Bandicam is able to record various 2D/3D games with 4K UHD quality at 480fps. In addition, while recording your screen, you can draw or outline your recording area with its inbuilt annotation function to highlight a scenario in real time. These features make this tool one of the best MP4 recorder software.
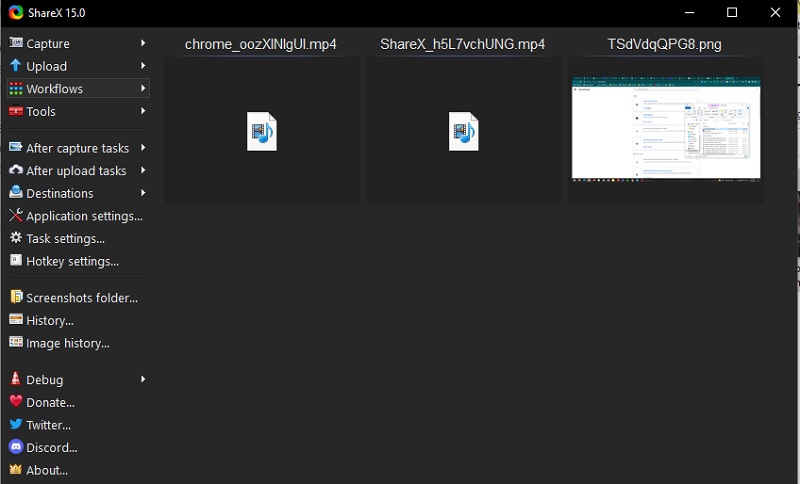
6. ShareX
Distinctive Feature: It is perfect for capturing screenshots and recording high-quality PC screens.
What is it best for?: It is suitable for capturing films and movies as it has no recording limit.
Pricing plans: It is also an open-source screen recording tool which means it is free to use, and you can also modify its features, UI, and processes.
When it comes to direct sharing of an MP4 file that has been recorded on your screen ShareX you ought to have. It can capture a partial part of your screen or a full screen, which can be exported in different formats, including MP4 files. Its recording panel consists of an intuitive function. It only has a few recording options, like pause, stop, and abort. Although it lacks a different annotation feature, recording MP4 files sometimes does not require this feature. Most especially when recording films and movies, you do not want to record a film with an arrow floating on your screen or even text. When saving the recorded file, it automatically exports the recorded screen into an MP4 file and email attachment. It uploads it on different social media platforms like Twitter.
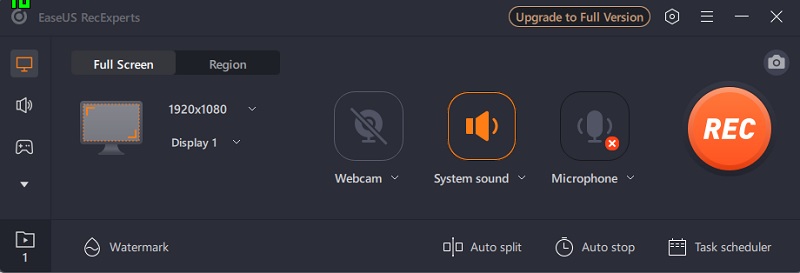
7. EaseUS
Distinctive Feature: It has advanced AI-powered features like noise remover, video enhancer, and video and audio extractor.
What is it best for?: It is suitable for recording 2D/3D gameplay highlights.
Pricing plans: Its basic features are free, yet to get its advanced features, you need to avail of its lifetime plans for $69.95
EaseUs is another MP4 recorder that captures screen activity and exports in MP4 files. With a webcam and audio, you can capture any region on your PC screen. It is suitable for gamers and PC games to use a recorder as it can capture each gameplay without lagging. It is also favorable for users who want to capture video tutorials or online videos, as this tool can efficiently do it. You can watch thousands of videos that have HD quality, like 2K and 4K, while recording them on your screen. The tool can preserve its quality and save it as an MP4 file. It also comes with video editing functions that can tweak and enhance the output of MP4 video. You can also directly share it through your social media accounts like YouTube, Facebook, and more.
Recording MP4 Video with Aqua Demo
Steps to record MP4 video using MP4 Recorder
Step 1 Install AceThinker Aqua Demo
The initial guide on recording MP4 videos with a suitable recorder is first to acquire the AceThinker Aqua Demo on your device. Then, you can visit its webpage on your web browser and tap the download button to get the file. Alternatively, a download button is presented below this step; you can hit the button to get the file installer and run it on your PC.Try it for Free
Free Download
Windows 8/10/11
Secure Download
Free Download
Mac OS X 10.15 and above
Secure Download
Step 2 Record MP4 Video
For this walkthrough, to present how to use this MP4 screen recorder, we will use a sample video from YouTube to record. In the tool’s interface, hit the Video Recorder option and drag it on the resolution or aspect ratio of the video. Next, hit the Rec button to instigate the process.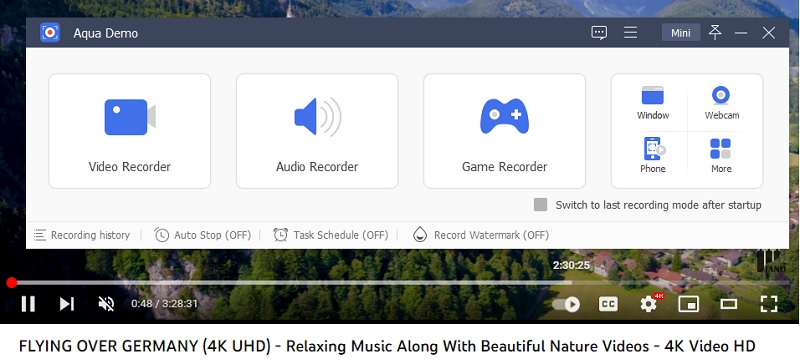
Step 3 Stop and Save the Recording
The final stage is to wait for the video to finish to stop the recording process. If you only need it for offline viewing, you do not need to annotate anything in the recording area. You can wait for the video to finish, which is the signal to stop the recording process. Then, the tool will provide a media player allowing you to preview the video. Hit Done to save the entire recorded MP4 file.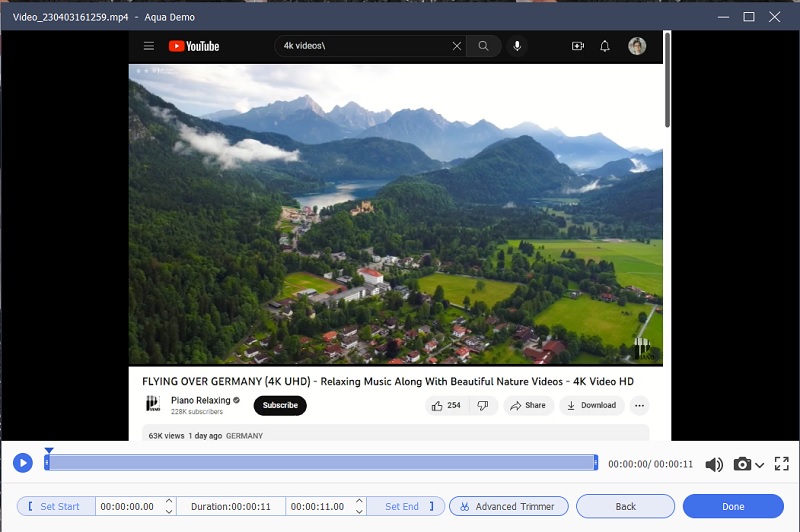
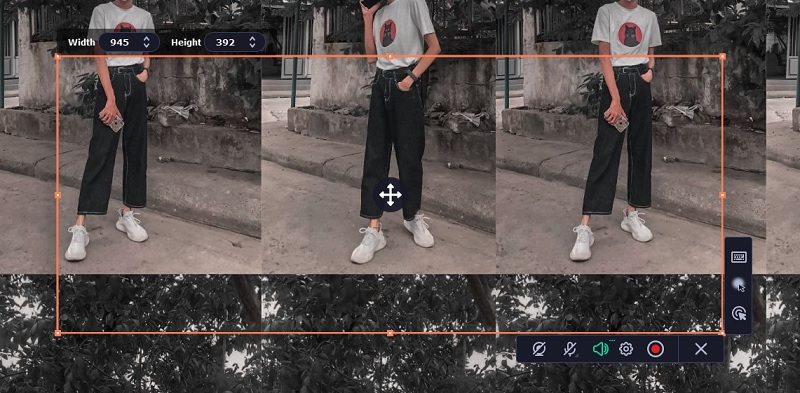
Step 4 Choosing the Recording Area
Selecting a recorded area on your PC screen when recording is crucial to perform. Choosing the proper location depends on what type of video you are trying to capture. For example, suppose you are recording PC games together with your webcam. In that case, you need a full-screen area for recording to capture the entire gameplay. On the other hand, customizing a recording area in a small rectangular shape is favorable when getting a highlight or a specific part of your screen. You can also use this when capturing MP4 files to avoid the black space or border, which is troublesome when viewing the recorded MP4 file offline. Nonetheless, AceThinker Aqua Demo provided many recording areas with its system. You can choose between full screen, select region/window, 1920x1080, 1280x720, 854x480, 1024x768, and 640x480.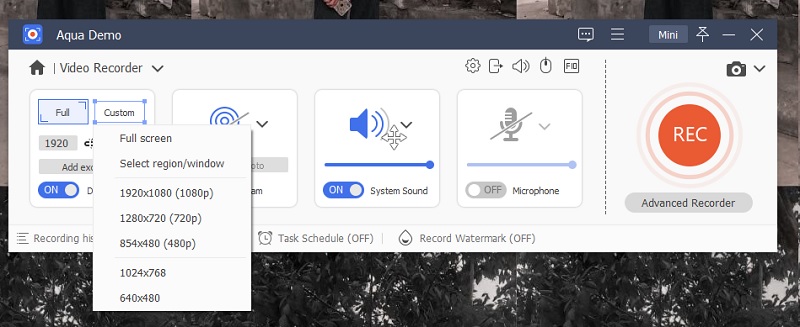
Step 5 Configuring the video settings
Modifying the recording settings is needed before you perform screen-capturing activities. You need to tweak and change different parameters which depend on your desired output. Since we are talking about MP4 files, we will check and see how to modify the file format into MP4 with Aqua Demo. What you need to perform is to access the Settings menu icon, which is located at the uppermost part of the screen recorder. Tap on the Preferences to prompt the settings window, giving you access to modify each parameter. Next, go to the output tab and check if the Video format is in MP4. You can also change the codec for MP4, the frame rate, and the video quality. Tap the OK button to save the changes made on your screen recorder.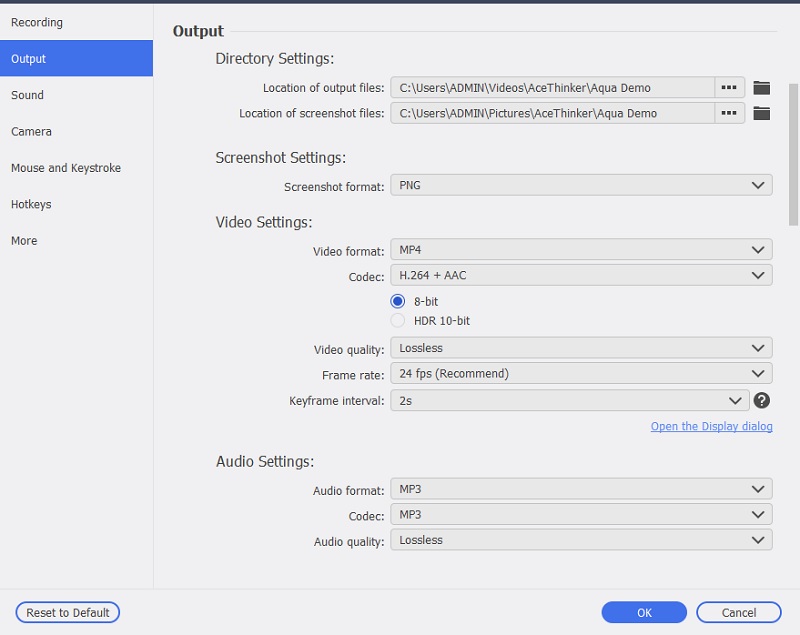
Step 6 Previewing the recorded video
We have already tackled how to record the MP4 file using Aqua Demo. Now, we need to preview the recorded file, and we will instruct you on how to do it. The easiest is when you have to tap the stop button. The tool will prompt you on its built-in media player, in which you can hit the play button to preview it. You can follow the guidelines for those files you previously recorded by selecting the Recording History on the tool’s interface. When you save a recording, hitting the Done option will prompt you to the list of files you previously recorded with the device. Double-click each clip to preview them in your computer’s media player.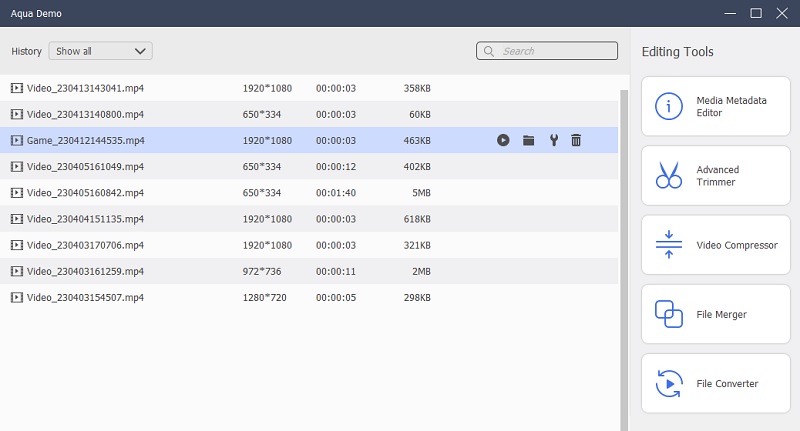
Step 7 Recording schedule setup
We said AceThinker Aqua Demo's main or distinct feature is its task scheduler. But do you know how to set it up? To give you a proper insight into what this function can offer, it is a feature that you can record your computer at a predetermined time. To enable it on Aqua Demo, access the tool's main interface and hit the Task Schedule below its main recording buttons. A new window will appear, which will have a more prominent plus icon. Tap on it to rename a task. Next, hit the Ok button to set up the recording parameters. You can input the Start time, the number of records within a week, the record length, the stop time, file size limits, and function after the recording session. When you have modified each parameter, you can hit done and wait for the time to pass to record your screen.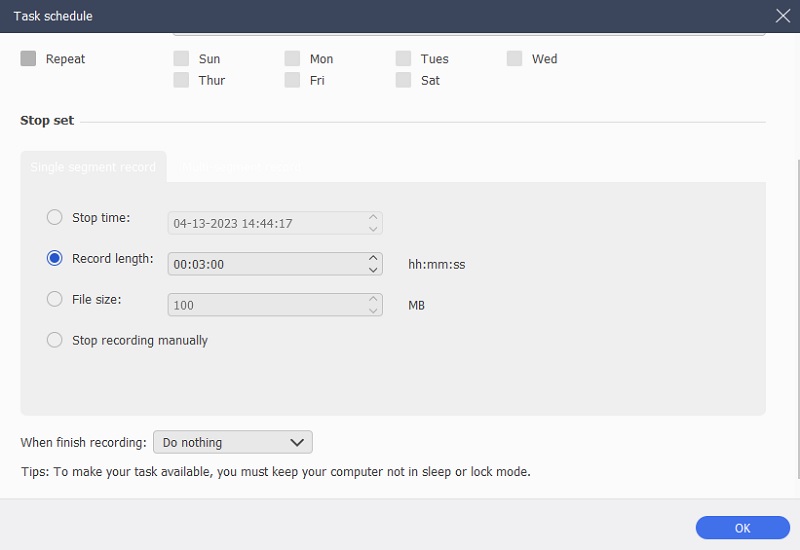
Step 8 Auto-stop options for recording
The final feature that this tool has is the Auto-stop option. This feature will allow your recording session to stop automatically without tapping the stop button. It is favorable for screen-capturing tasks like recording a movie. You need to set up a specific time or length of the recording session to end the process. There are different ways to stop the recording process in Aqua Demo automatically. The first one is the recording length. This option or condition will stop the recording process when the size of the recording reaches its limit. For example, you have set it up into three hours. Then, when you instigate the recording session, the timer will run until it reaches the limit. If that is so, it will automatically stop the session. The other one is the recording file size. This condition does not limit the length of your recording, yet it is based on the accumulated file size. For instance, you have determined the recording to 100Mb. Then, the recording process will stop when it reaches the limit. The final condition is the ending time. This feature is based on the time on your PC. When you have set up a time to stop your recording, the app will automatically terminate the recording process at the exact time.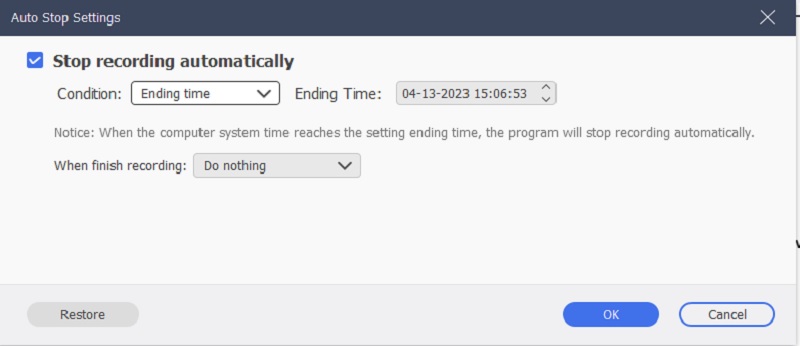
- This tool can record high-quality video.
- You can utilize its game recording mode for more smooth gaming recording.
- Capture your screen with your webcam without any complications.
Editing the Recorded MP4 Video - Wind Cut
When capturing videos online or even your screen activity, it is much needed to edit your video. Although the tools mentioned in this review contain video editing functions, having a dedicated tool to edit video is much better use. It can provide the best features to beautify your MP4 file. AceThinker Wind Cut is a prominent video editing software that will guide you in enhancing your video. It comes with basic editing functions, including trimming, cropping, merging, splitting, and more. Its advanced features are also undeniably helpful. These features include chroma keying, zooming, filtering, adding subtitles, editing background color, and more. Look for the brief descriptions of the different functions of Wind Cut to know more about their processes.
Try it for Free
Free Download
Windows 8/10/11
Secure Download
Free Download
Mac OS X 10.15 and above
Secure Download
Step 1 Trimming the video
The trimming function of Wind Cut is comprehensive and straightforward. What you need to perform is to drag the recorded video on the tool’s timeline pane. Highlight the entire video and drag the indicator on the exact time you need to cut the video. Next, you can hit the Scissor icon on the arrow to split the video into two and delete the part you do not want. Another method is tapping the scissor icon above the timeline panel to split and trim the video. The final process is to drag the video from its starting or ending time to reduce the video clip.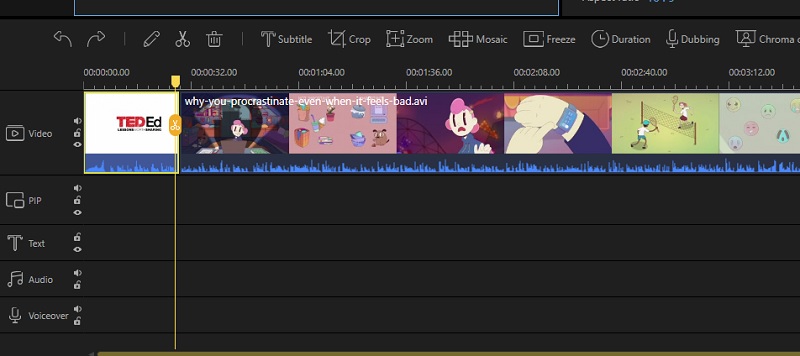
Step 2 Saving and Exporting the Recorded MP4 Video
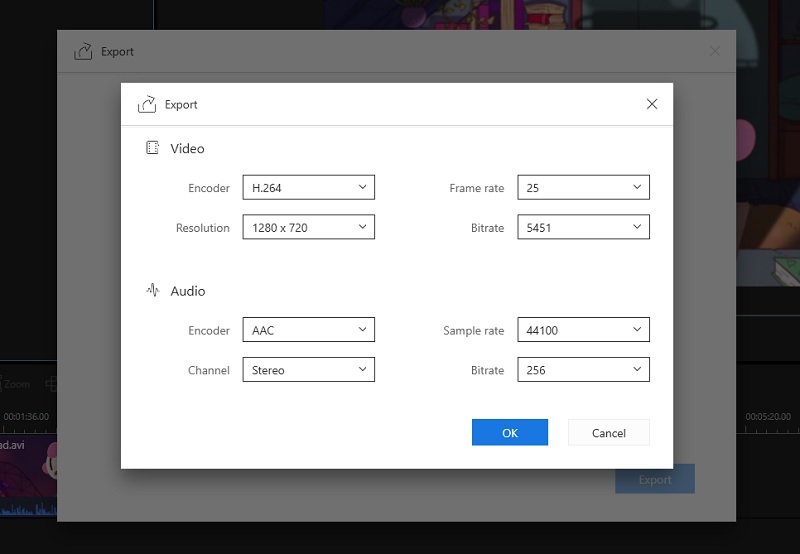
You need to hit the Export button when saving the recorded MP4 with this editing tool. This function is located below the media player's uppermost part of the timeline panel. There are different parameters when saving the file. You can change its metadata, like the name of the file. You can also modify or create an output folder for the MP4 file. In addition, you can change the video format and the quality output between higher and standard quality. You can also import subtitle files for videos you have acquired with subtitle files. If the audio file is separate from the video, you can also add and sync it on the video. The audio file is also changed according to your preferred format. Hit the Export option to save the recorded MP4 file.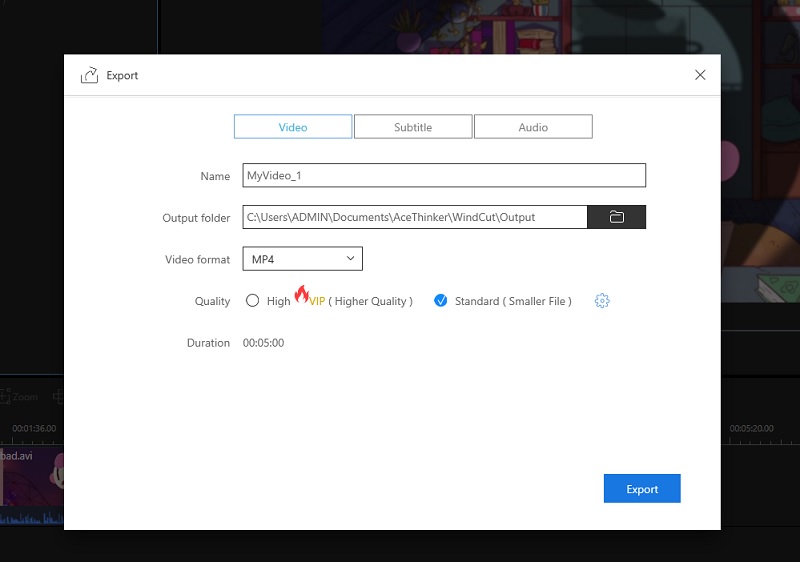
Step 3 Choosing the output format
Selecting the output format with Wind Cut is easy. You can choose or select the output file once you have hit the Export button. This editing tool consists of six video formats for your recorded file; one of these is MP4. If you want to save the video file in different containers, you can select from AVI, WMV, MKV, MOV, and GIF. In addition, you can always change the video parameters of your recorded file. Before exporting the file, you can modify the video codecs, frame rate, bitrate, and even resolution. You can also change different parameters for the audio file of your video.